
Pardot (MCAE) Lighting Email Builder Template Quick-Start Guide
Today’s digital marketing landscape is consistently changing, which means that for marketers to be successful, they must find a way to gain an edge over the competition. While email marketing remains one of the most effective ways to stay top of mind with your audience and drive results, many marketers struggle to create emails that drive those conversions.
Enter the Marketing Cloud Account Engagement (MCAE) Lightning App within Salesforce formerly known as Pardot.
Why is this relevant right now? With the 2022 retirement of the legacy Pardot app in Salesforce and many marketers making the move from 3rd party email builders, it’s important to understand how to best use MCAE’s new email builder so you can shorten the learning curve and drive the ever-important ROI.
So today, we’re diving into how to make the new email builder work for you without getting IT involved and without a lack of coding expertise serving as a bottleneck to your marketing efforts.
Meet the MCAE Email Lightning Builder
In the past, marketers using the legacy Pardot email builder needed some HTML coding knowledge to either ensure that code pulled from other builders worked with Pardot or to edit the sections of their email.
The new Lightning Email builder features a drag-and-drop editor that allows you to edit your email templates and create engaging emails seamlessly and with little to no coding know-how.
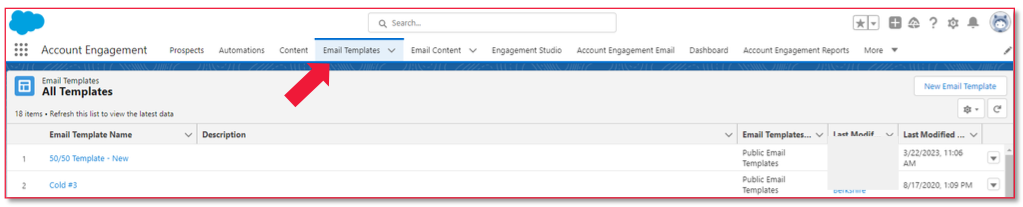
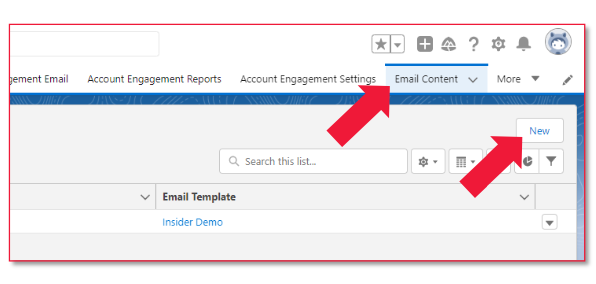
Your Email Templates
MCAE features pre-designed email templates for a variety of email campaigns, such as newsletters, promotional emails, event invitations, and more. Because you can customize the templates for your brand, they give you a professional and consistent look to your emails and save you time while helping improve your email engagement rates.
You can find your email templates in the top navigation bar of your lightning app.
Using MCAE’s Email Templates
While MCAE’s email templates offer you a powerful starting point, there may come a time when you want to create your own. Whether you need emails that better fit your unique brand, you want visuals that enhance your message, or you want to incorporate different types of content into your emails, taking the time to create custom templates now can save you hours in the long run.
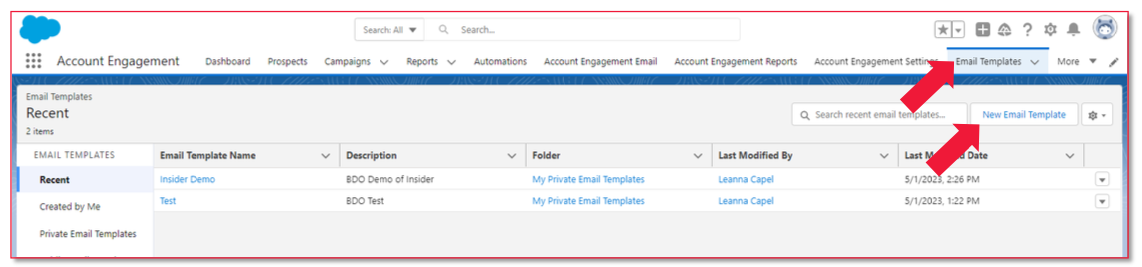
To get started, navigate to “Email Templates” and chose the “New Email Template” button.
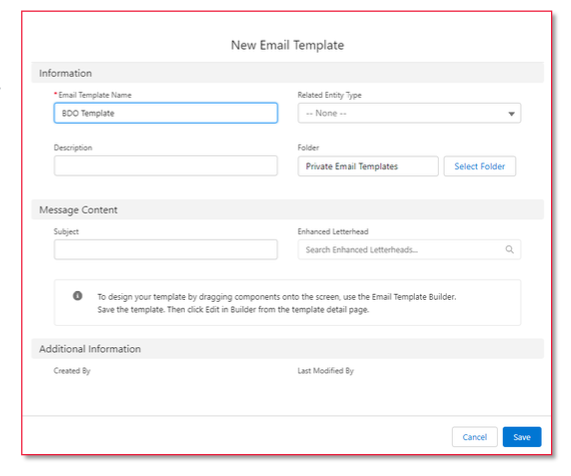
Next, you’ll want to
- Name your template with a convention that makes its purpose and structure clear and makes it easy to differentiate this template from any others.
- Set a sample subject line, even if it’s a placeholder like “Place Subject Line Here,” and update it when you create specific emails.
- Select a location to save it in your folder structure.
- Save the template in the selected location.
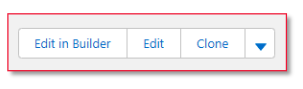
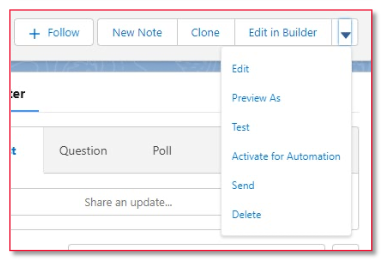
From here on out, it’s about personalizing the template so that it fits your branding and your needs. To do so, proceed to 'Edit in Builder' to start personalizing your template with modifications that might include:
- Customizing the email content types.
- Establishing the email structure.
- Incorporating static styling features like text size and formatting, background colors, padding, and more. Don’t forget to follow accessibility best practices!
Building Your Templates Step by Step
Once you are in build mode, you can create effective and engaging email templates easily. We’re providing a step-by-step walkthrough so you can dive in whenever it’s convenient for you.
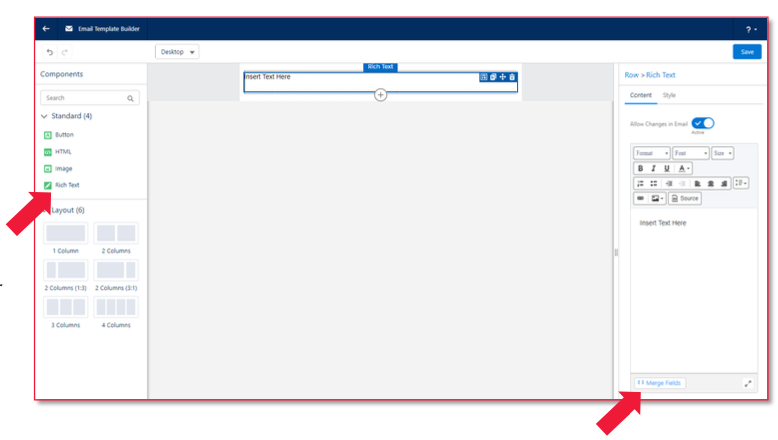
Step 1: Rich Text
Drag the rich text component over. To add your text, either type it into this block or copy and paste it from the source. You’ll want to use rich text for section headers and email body copy and to create a standard footer. Be sure to use 'Merge Fields’ to include your subscription Preference Center or Unsubscribe links in the footer, or any other dynamic content, including customer name or custom fields.
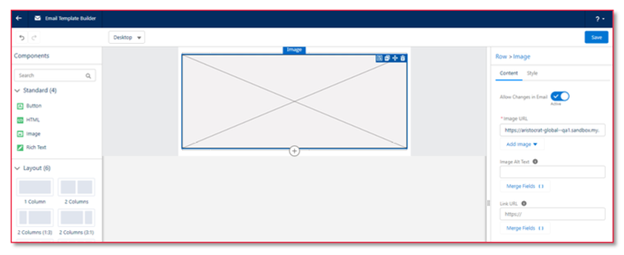
Step 2: Images
Images are powerful in emails, so you’ll likely want to include at least one image in your template. To do so drag the image component over, click on the image block, elect 'Content' from the options, and under 'Image URL', click 'Add Image’ before uploading from Salesforce CMS or external files.
A few notes on images:
- We recommend storing images in CMS for secure content linking.
- Images should be designed fit the standard full email width of 600px, which cannot be changed.
- After uploading the image, you can link the image, adjust sizing by percentage, modify its position (left, right, center) and add alt text.
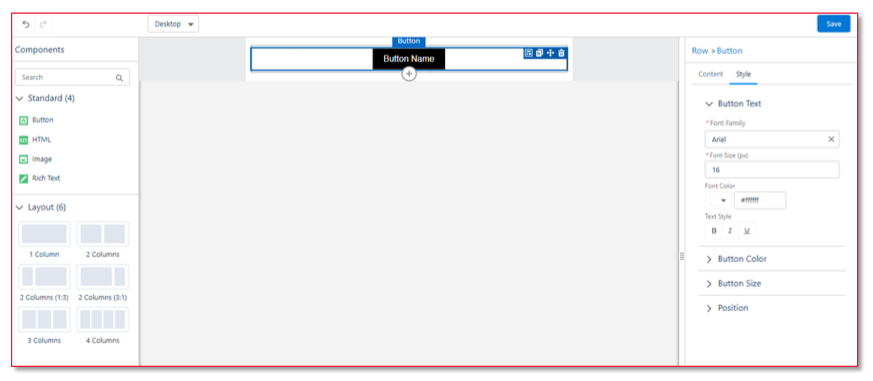
Step 3: Buttons
Buttons make it easier to guide your readers to take action. To add buttons, insert the button component and click the button to modify text, color, size, position, font, link, and corner radius. You can move the button(s) around by clicking and dragging.
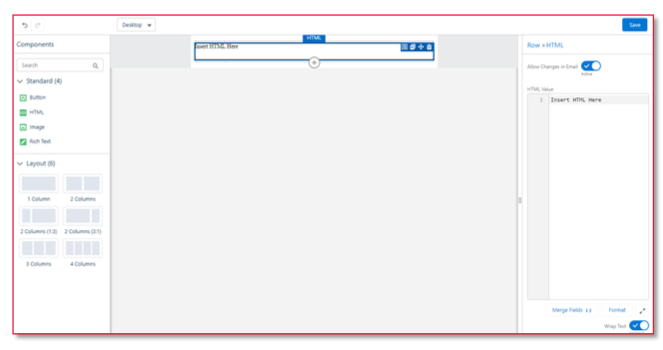
Step 4: HTML Component
There may be times when you’ll want to include HTML blocks in your email templates. For example, you might want to bring over an HTML header or footer from a previous visually appealing email to enhance your Lightning Email Template.
It’s worth noting that the builder doesn’t recognize all HTML code, including tables.
To use HTML blocks, drag over the HTML component, add your HTML to the editor and click Save.
Building Your Email
Once your template is finalized, you can use it to send email campaigns. Here’s how to build and send emails.
Find “Email Content” in your top navigation bar and click ‘New.’

- Name your email using your preferred naming convention (for example Date, Audience, Subject)
- Choose your newly created template and click 'Edit in Builder' located on the top left. This will lead you to a familiar interface resembling the one used to build the template.
- Customize the content of your email in the builder interface.
- Save your work and return to the email using the back arrow at the top left corner.
- Select 'Edit' at the top right to sync from HTML and create a text-only version of the email. Make sure the text version is readable, skimmable and organized for easy reading. They are sent by default and approximately 1% of every send will get the text version exclusively.
- Edit the subject line and save the email.
- After saving the email, go back to the 'Email Content' section.
- Find the dropdown next to "Edit" and select 'Test.’ (Make sure to prepare your testing lists ahead of time.)
- Save any changes made during testing.
Sending or Scheduling Your Email
Once your email is final and ready to go, it’s time to send your email using the following steps!
- Click the dropdown arrow at the top right corner and choose 'Send.’
- Assign the email to a campaign.
- Select the recipient list and suppression lists.
- Set the Primary Sender and Reply-To User.
- Configure any completion actions.
- Choose between 'Send Now' or 'Send Later' to schedule the email.
- Use your lists to test and send the email immediately or at a scheduled time.
Gathering Data and Reports
Now that you’ve sent your emails out it’s time to gather data on their performance so you can adapt your approach and future emails.
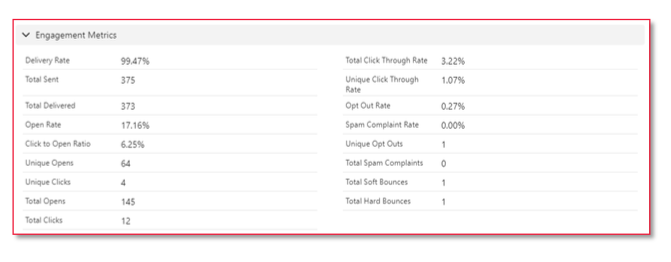
Here are three ways to gather the data you need:
- Option 1: Go to the Reports section to access engagement data, click on ‘Emails’ and select ‘List emails.’
- Option 2: Within the Email Content section, find the sent email you want to view report data, scroll to the bottom, and click on 'Engagement Metrics.’
- Option 3: Click on the 'Related' tab at the top of the page, access the your report and view the engagement data for the email.
And of course, if you have any challenges accessing these, you can reach out to your Salesforce Admin.
Best Practices to Boost Email Builder Efficiency
- SAVE, SAVE, SAVE! The email builder does not autosave. Don’t lose your work.
- Add images to the Rich Text Component to have access to the source code. You can better control image attributes if you are not seeing the results you desire with the Image Component.
- Keep designs simple with minimal columns, copy, and images. Fewer links and CTAs give you greater insight with the best practice of 3-5 different links max with primary objective link using buttons.
- Design your images to fit the standard full email width of 600px. You cannot change the width, so this will ensure your images are optimized for viewability.
- Make your email viewable online. Add the merge field {{{View_Online}}} to your template to provide recipients with the option to view your emails as web pages. Place the merge field in the footer of your template and hyperlink it to the text 'View As Webpage.’
- Optimize for mobile. Take advantage of the tool's convenient feature that allows effortless switching between desktop and mobile views. Utilize this feature to optimize your template for both desktop and mobile formats.
- Don’t rely on the preview alone. Send a test and check the email in as many variations as possible. At a minimum, test on both desktop and mobile devices.
Rinse and Repeat to Streamline and Simplify Your Marketing
MCAE’s Lightning email builder is here and it’s a huge improvement to the legacy option. Whether you’re new to MCAE or just the new email builder, having an option that interfaces with your CRM, can make your marketing more efficient and effective.
By bookmarking this guide and referring to it as you create and personalize your emails, you can harness the power of your email list and increase engagement.
Need help navigating your MCAE instance? Explore our services and reach out to the BDO Digital team for help.
SHARE